 I’m gonna tell you straight up. The best thing about this DIY is you get to eat a whole box of chocolates.
Oh, and you get a wicked cute light to hang afterwards.
You may get a heart shaped box of chocolates over the next week, and if you do, keep it! If you don’t, head over to your local grocery store and buy the whole lot right now. This heart shaped marquee light is actually really simple and incredibly cute. So go eat those chocolates so you can start making!
 You could use a string of christmas lights if you’re okay with the wire hanging below the marquee so it can be plugged in, but I opted for battery powered mini lights so I can tuck the control behind the marquee. I didn’t include it in this picture but if you have a large pin it will come in very handy for puncturing the holes.

Steps
 When choosing a chocolate box I wanted something with plain colour on its sides. As a bonus, this pot of gold box had an outline of a heart inside the top lid making it easy to ensure the dots would remain heart shaped. If yours doesn’t have this just trace a heart inside your heart lids. Use your measuring tape to map out how far apart you want your lights to be. I opted for 1 inch. Start at the top centre of the heart and work your way around one side to the bottom. You could do the same for the opposite side of the heart, but to make sure the lights would be matched up, I drew lines from each dot across to the opposite side. Make sure that in this planning stage you have enough light bulbs on your strand for the number of holes you will puncture. There’s nothing worse than puncturing your holes and realizing you don’t have enough lights to put through them.
 Use hot glue to fuse the two hearts together. Make sure they’ll line up evenly pressing them together with the hot glue or you’ll end up with a not so hot mess.
Use a pin to poke a hole in each dot, then make the hole larger with your exacto knife. You want it to be large enough for your light bulbs to fit through, but no bigger. When punctured, thick paper tends to bunch up. Clean up any paper that needs to be ripped or cut off.
 Now comes the fun part. Evenly paint the surface in any metallic colour that matches your glitter. I obviously went for gold because gold = instant glam. Apply your glitter while the paint is still wet. Shake the glitter around to ensure you get an even coat. Allow about 1 hour for the paint and glitter to dry. Once it’s dry do you know what you get to do? Install the lights!
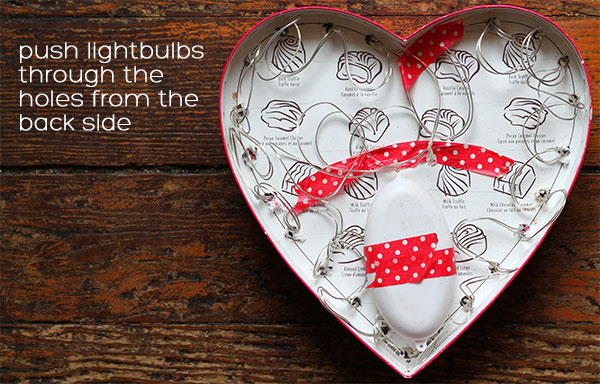
 Installing the lights is super simple. Just push each light through the holes and boom, done! I used some washi tape to secure some lights and wires in place.
The nice thing about using the chocolate box is that there’s space in the back for you to hide all this mess shown above and also your battery pack. How awesome is that?
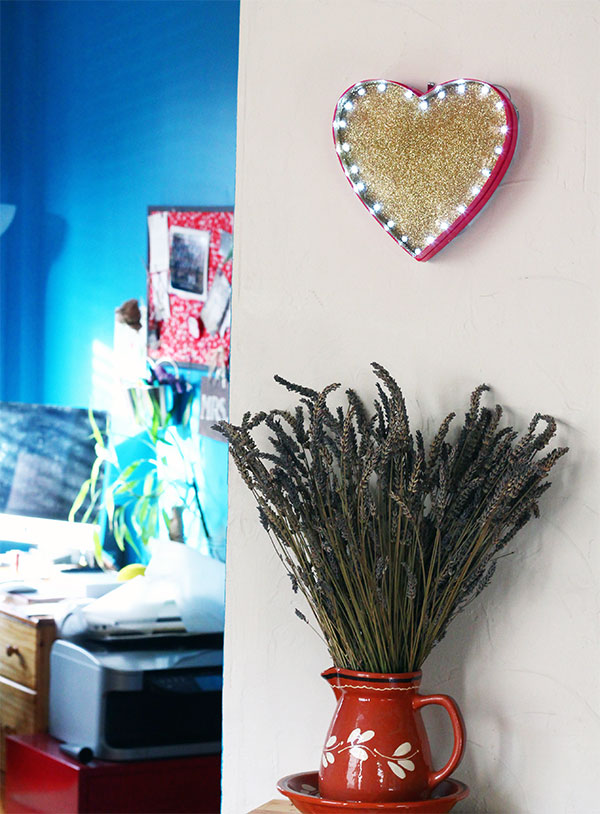
 This is how my heart marquee currently hangs on my hallway wall. (Please ignore the mess of my office in the background…*ahem*) The heart marquee is the first thing I see when I enter my home and it always makes me smile.
 Lucy is being your typical cat and still deciding how she feels about this lighted object. I love it Lucy so too bad, it’s staying.

And while we’re talking it, what’s your favourite chocolate?
I gotta say I’m a sucker for anything with peanut butter in it


This is so creative! I love how the cords/battery are all hidden away. I am a dark chocolate fan… the darker the better! 🙂
Oh, I love it! I also love that you used the word “wicked” which is oh-so-East-Coast yet I can’t quite pull it off. And you can. Come visit and teach me how, okay? xo
@Stephanie: Mmmm yes dark chocolate!
@Joy: lol it is a total Boston thing isn’t it? Yup, we’ll be saying wicked with every sentence by the end!
I have to confess – what drew me to your blog about this is the picture of Lucy staring at your heart marquee! LOL Even though you can’t see her face, you can almost tell that she is trying to make up her mind about it. 😀 Very cute and clever idea, btw. Thanks for sharing!
She was too funny looking at the light I had to snap a picture and share!
Thanks so much Karen
This is fantastic! And I can never say no to a box of chocolates 🙂
oh me neither
Sees Candy. — hands down best Chocolate candy in a box!!! Worth every penny!!
And jcpenney right now has a deal where they are giving away a free box with every purchase of fine jewelry over $75.
Oh one other thing. Your Heart light is really sweet. I have a heart box I have been hanging onto for 2 yrs wondering what I could do with it. I may give this a whirl. Which confirms that crafters are not nuts for hanging on to random items!
Perfect! It pays to be a little bit of a hoarder
Such a cute DIY!
Thanks Kim! I love lighting it up at night
Brilliant idea.
Hi there! I just finished making this project and I wanted to thank you for your excellent tutorial!! I love how it turned out and it fits perfectly in my room. Hats off to you 🙂
Cheers!
Sarah
Hooray! I’m so glad it worked out for you Sarah!